
Introduction
With Christmas approaching, the idea of crafting a personalized busy board for my toddler seemed far more meaningful than buying one. Creating a custom busy board felt like a special gift filled with love and personal touches. This project wasn’t just about making a fun and engaging toy; it was an opportunity to tailor it to my child’s interests and needs while enjoying the creative process.
A busy board, often hailed as a toddler’s playground of exploration, encourages sensory engagement, fine motor skills, and cognitive development. With the fusion of Arduino’s programmable capabilities and a diverse array of inputs and outputs, this project aims to craft a personalized interactive board that will spark curiosity and captivate your little one’s imagination.
Join me as we explore the intricacies of selecting the perfect inputs and outputs, deciding on the necessary components, delving into the circuitry, and weaving them all together to create an interactive wonderland for our toddlers. Let’s delve into the world of child-centric DIY innovation and create a vibrant and captivating experience for our little explorers.

Choosing Inputs
Selecting the right inputs is the foundation of designing an engaging busy board for your toddler. It’s crucial to offer a variety of tactile and interactive elements that stimulate their senses and foster exploration. After thoughtful consideration, I opted for arcade-style pushbuttons in vibrant colors and toggle switches, aiming to create a diverse array of interactive elements. These buttons and switches provide different shapes, sizes, and functions, ensuring a multifaceted experience that encourages exploration and learning.
Additionally, I’m contemplating the inclusion of a potentiometer. This component can introduce a turning element, adding another layer of engagement and interaction to the busy board. While it’s currently under consideration, the potentiometer could potentially provide a unique activity for your toddler to engage with, encouraging motor skill development and curiosity.
The selection of inputs plays a pivotal role in shaping the interactive experience of the busy board, and I’m excited about the possibilities these choices offer to enrich and captivate my toddler’s curiosity.
Choosing Outputs
Engaging outputs are just as essential as inputs in creating an interactive and stimulating experience for a toddler. In designing my busy board, I wanted to provide a diverse range of outputs that would captivate and entertain while also introducing some educational elements.
While LED lights are a common choice due to their visual appeal and simplicity, I decided to expand beyond this by incorporating multiple outputs. LED lights are a vibrant addition that offers visual feedback, providing immediate and captivating responses to the toddler’s interaction.
Additionally, I opted for an analog-style voltmeter as an output. This serves a dual purpose—it not only adds an intriguing visual element to the board but also functions as a means to monitor the battery voltage. This interactive feature introduces an educational aspect, allowing the toddler to engage with the concept of voltage in a hands-on manner while being visually stimulated.
Moreover, I chose to include a mechanical counter, which offers a physical and tactile element for interaction. The counter allows for simple counting activities, promoting basic numerical skills and engaging the toddler in a fun and interactive way.
By incorporating these diverse outputs, I aim to create a busy board that not only entertains but also introduces basic concepts and encourages exploration and learning in an interactive and playful manner.

The Circuit
The backbone of the busy board’s functionality lies in its circuit design. At its core, the board will be powered by a 12V AA battery pack, branching out into various components to offer engaging inputs and outputs for a toddler.
The circuit branches into four parallel channels from the battery pack. The first channel is connected to a pushbutton in series with a mechanical counter, enabling counting activities when the button is pressed. This interactive feature introduces basic numerical skills and encourages tactile engagement.
The second parallel channel involves a pushbutton connected in series with an analog voltmeter. When activated, this button will display the battery pack’s voltage, offering a visual representation of electrical concepts in a simple and engaging manner.
In the third branch, a toggle switch is integrated in series with LED lights and a resistor. Activating the toggle switch illuminates the LEDs, providing visual stimulation and interaction.
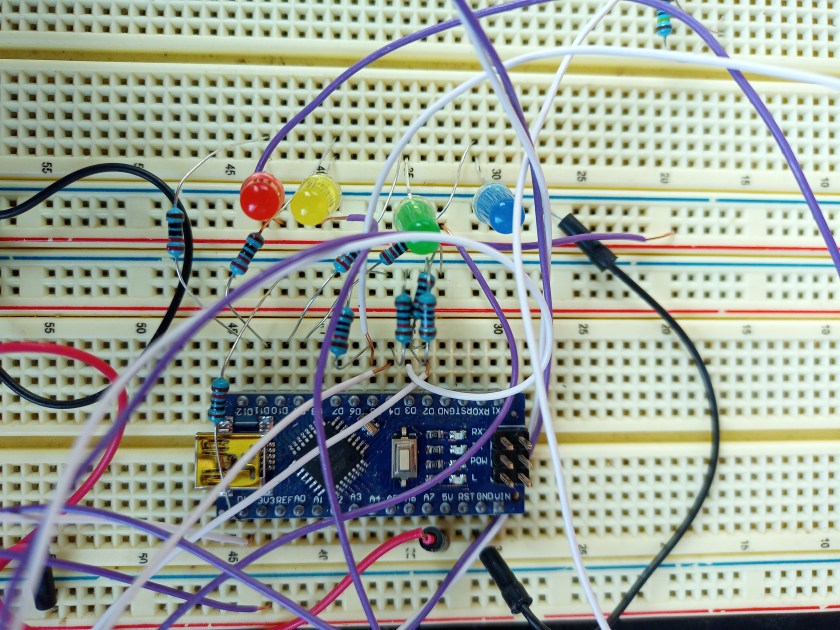
The final branch powers the Arduino through its Vin and GND pins, serving as the control center of the busy board. The Arduino will have four LED outputs—each a different color (red, yellow, green, and blue)—offering a range of visual feedback for the toddler’s engagement. Additionally, four pushbuttons with pull-down resistors serve as inputs to the Arduino, facilitating interaction and control.
Moreover, a toggle switch, initially dedicated to simple functionality, will later be utilized to enable more advanced programming options for enhanced interactivity and learning experiences.
This comprehensive circuit layout ensures an array of interactive inputs and outputs, designed to engage, educate, and entertain a young child using the busy board.
Conclusion
Crafting an Arduino-based busy board for toddlers is not just about assembling a collection of buttons, lights, and switches; it’s about fostering an environment where learning meets play. By carefully selecting inputs and outputs, this busy board becomes a canvas for exploration, discovery, and skill development.
The choice of arcade-style buttons, toggle switches, LED lights, an analog voltmeter, and a mechanical counter offers a diverse range of sensory experiences. From tactile interactions with buttons to observing changing LED colors, each element contributes to a rich, interactive learning environment.
The heart of this bustling innovation lies in its circuitry—a combination of simple yet engaging components powered by a 12V AA battery pack. This circuit provides the foundation for creative exploration and early educational experiences.
As this Arduino-based busy board comes together, it opens doors for not only entertainment but also educational growth. Through basic counting, understanding electrical concepts, and enjoying visual stimuli, toddlers embark on a journey of discovery and learning.
Stay tuned for more DIY projects, innovative creations, and learning-centric designs. Follow us on social media for updates, additional projects, and exciting new ideas to inspire creativity and exploration.
